
Below is a simple step-by-step guide for setting up an individual V5 box. I typically run thru this set up for my customers for 2 main reasons:
- It reduces the number of questions and support that I need to provide. This is especially helpful for those that are not tech savvy. Once set up, customers can literally plug-in and start using.
- This allows me to ensure that the box and remote are working properly (and it only takes me about a minute of set-up time per box). On a very rare occasion, a box will require additional steps (“Heat” Apps not showing up OR a faulty box.
Step-By-Step Guide:
1.) Setup Vsee Box
- Remove from Box
- Plug in Power Adapter to outlet
- Plug HDMI Cord to a TV
- Plug in Ethernet cord for hardwired connection (will also work with WiFi but the setup process will take longer).
2.) Once properly plugged in, you will see a screen like this:
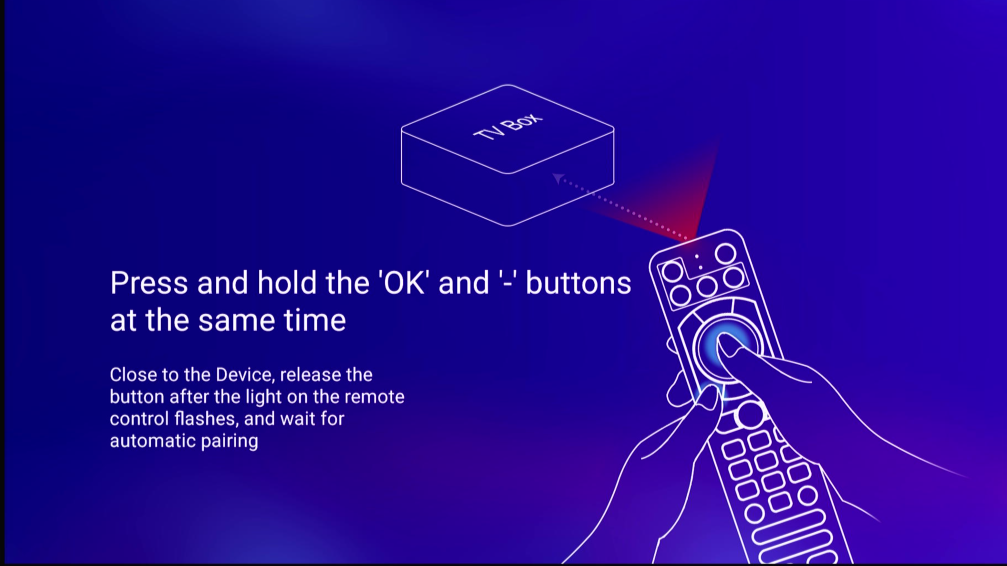
- Pull out the remote and insert 2 ‘AAA’ batteries
- Press and hold the ‘OK’ and ‘-‘ buttons as shown below.
- Wait for screen to confirm remote has been connected.
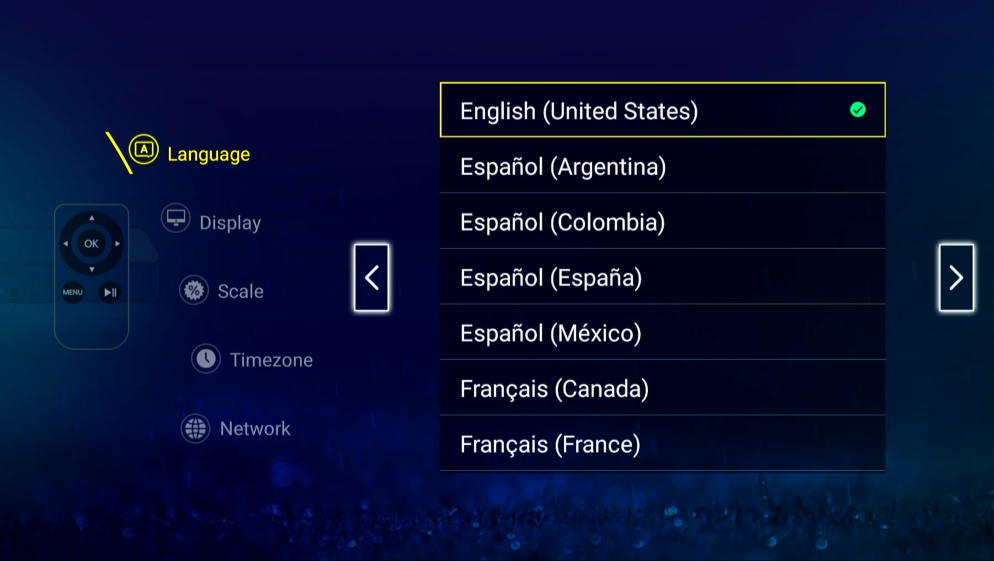
3.) Select the Language you would like and push the ‘>’ key on remote
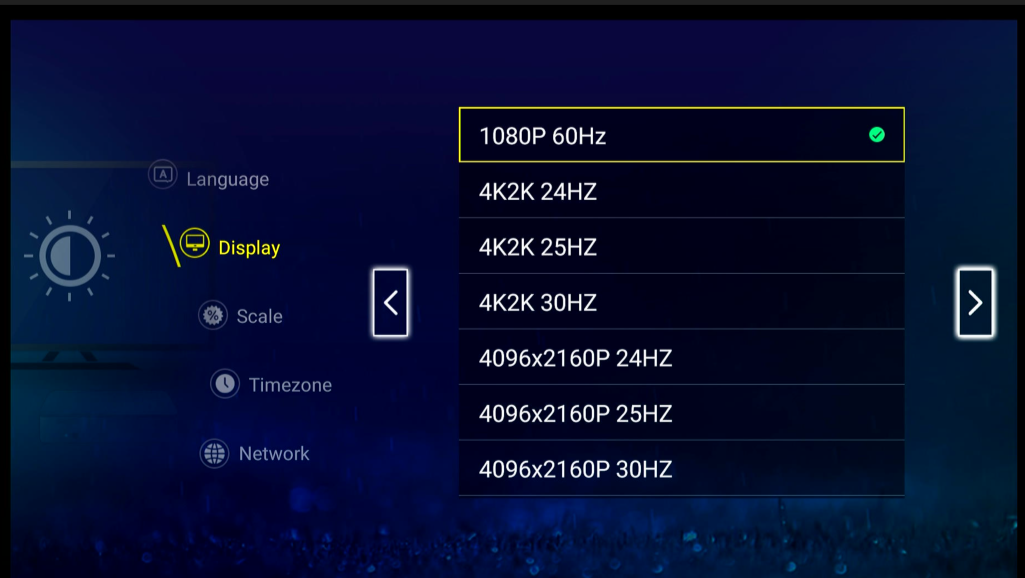
4. Select default ‘1080P 60Hz’ and push the ‘>’ key on remote
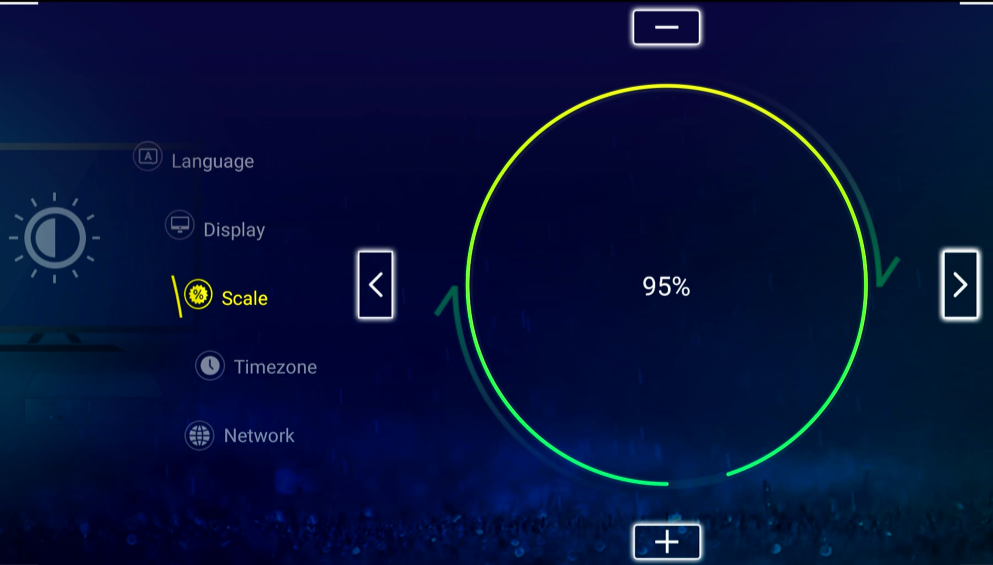
5). Select default ‘95%’ and push the ‘>’ key on remote.
Note: I usually leave this one as default but can be increased to fit better onto tv screen.
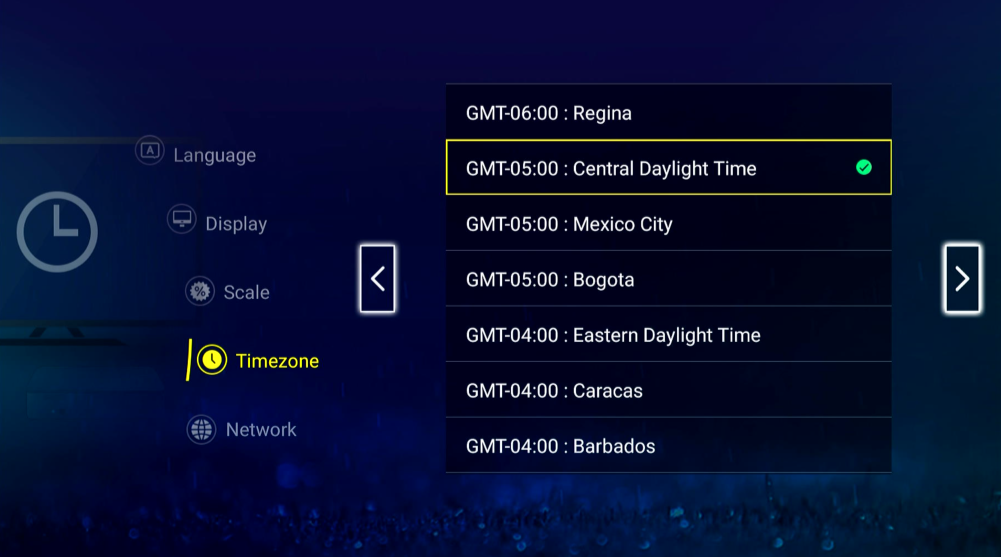
6. Scroll to find the time zone where this box will be located and push the ‘>’ key on remote
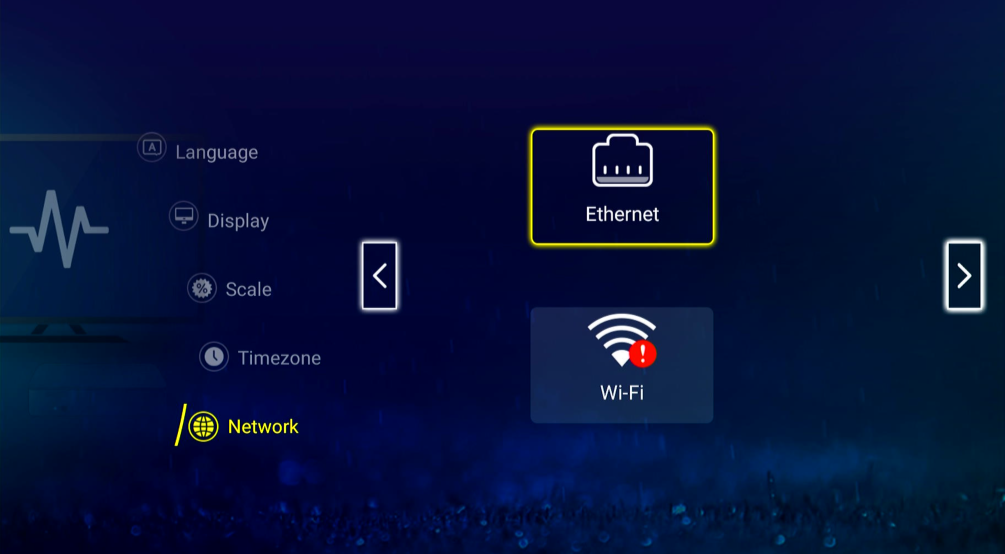
4. This will confirm you are connected to the internet and push the ‘>’ key on remote. If you do see red exclamation points, it means you are not properly connected.
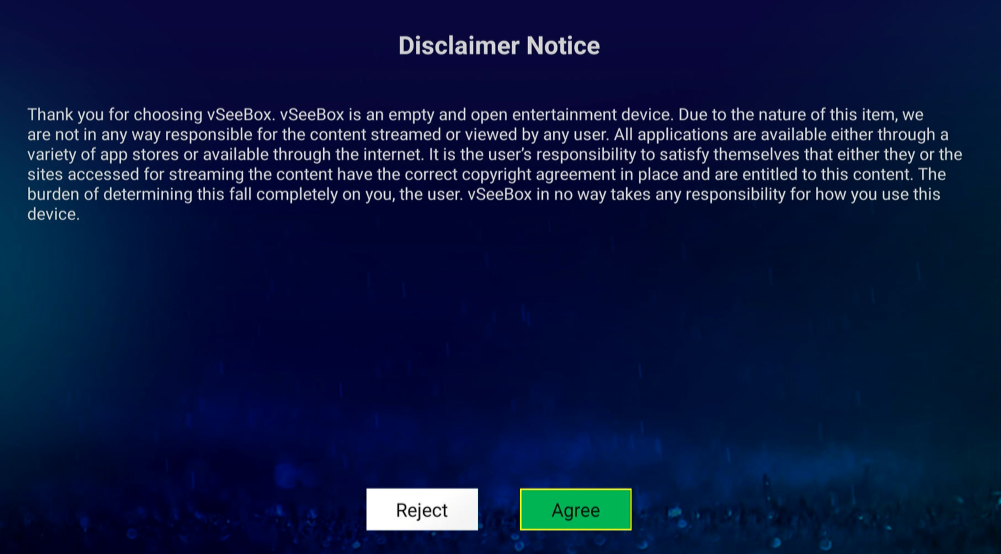
7.) Select “Agree”
RESOURCES: